
写在最前
我们计划实现 Eureka 与 Nacos 之间的双向同步功能。然而,nacos-sync 官方版本默认未提供登录认证机制,这意味着在管理控制台中配置 Eureka 与 Nacos 集群时,包含的敏感信息(如密码)将直接暴露,存在较大的安全风险。为了避免这一隐患,我们参考了上一章节 Eureka 的认证方案,引入 spring-boot-starter-security,为 nacos-sync 增加统一的登录认证功能,从而保障敏感配置和管理接口的安全性。
1. docker 部署
2. kubernetes 部署
2.1 Dockerfile
具体操作可以参考 4. 步骤的代码变更。基本流程分为两步:
下载官方原始 https://github.com/nacos-group/nacos-sync/releases/download/0.5.0/nacos-sync-0.5.0.tar.gz
获取官方发布的
nacos-sync-*.tar.gz包。解压后删除原有的
nacos-sync-service.jar。
重新打包覆盖 JAR
在本地修改或重新编译
nacossync-worker模块(比如加入spring-boot-starter-security依赖)。通过 4. 步骤的源码重新打包编译,生成包含 Spring Security 认证的
nacos-sync-service.jar,然后使用tar -cf命令将新的 JAR 覆盖回原始目录结构,重新打包成 tar.gz。
docker buildx build --push --platform linux/amd64,linux/arm64 -t tanqidi/nacos-sync:0.5.0 .
FROM openjdk:17-jdk

WORKDIR /app

COPY nacos-sync-0.5.0.tar.gz /app/

RUN tar -xf nacos-sync-0.5.0.tar.gz && \
    rm nacos-sync-0.5.0.tar.gz

EXPOSE 8080

# 直接前台启动 jar
CMD ["java", "-jar", "/app/nacos-sync/nacos-sync-server.jar", "--spring.config.location=/app/nacos-sync/conf/application.properties"]
2.2 service
使用nodeport来试验访问
kind: Service
apiVersion: v1
metadata:
  name: nacos-sync
  namespace: bx
  labels:
    app: nacos-sync
  annotations:
    kubesphere.io/creator: admin
spec:
  ports:
    - name: http-8080
      protocol: TCP
      port: 8080
      targetPort: 8080
      nodePort: 30195
  selector:
    app: nacos-sync
  type: NodePort
  sessionAffinity: None
  externalTrafficPolicy: Cluster
  ipFamilies:
    - IPv4
  ipFamilyPolicy: SingleStack
  internalTrafficPolicy: Cluster
2.3 configmap
注意要变更成为你的数据库连接地址与账号密码,最重要的是security认证页面的账号密码也改一下。
https://github.com/nacos-group/nacos-sync/blob/0.5.0/nacossync-distribution/bin/nacosSync.sql
kind: ConfigMap
apiVersion: v1
metadata:
  name: nacos-sync-config
  namespace: bx
  annotations:
    kubesphere.io/creator: admin
data:
  application.properties: >-
    server.port=8080

    server.servlet.context-path=/


    spring.jpa.properties.hibernate.dialect=org.hibernate.dialect.MySQL5Dialect

    spring.jpa.hibernate.ddl-auto=update

    spring.jpa.properties.hibernate.show_sql=false


    spring.cloud.discovery.enabled=false

    spring.main.allow-circular-references=true


    spring.datasource.url=jdbc:mysql://172.31.0.99:3306/nacos_sync?characterEncoding=utf8

    spring.datasource.username=root

    spring.datasource.password=123456

    management.endpoints.web.exposure.include=*

    management.endpoint.health.show-details=always


    # 配置security账号密码

    spring.security.user.name=admin

    spring.security.user.password=35274E93-D57F-4B6A-8B48-659604AC0811
2.4 deployment
kind: Deployment
apiVersion: apps/v1
metadata:
  name: nacos-sync
  namespace: bx
  annotations:
    deployment.kubernetes.io/revision: '1'
    kubesphere.io/creator: admin
spec:
  replicas: 1
  selector:
    matchLabels:
      app: nacos-sync
  template:
    metadata:
      creationTimestamp: null
      labels:
        app: nacos-sync
      annotations:
        kubesphere.io/creator: admin
        kubesphere.io/imagepullsecrets: '{}'
        logging.kubesphere.io/logsidecar-config: '{}'
    spec:
      volumes:
        - name: config-volume
          configMap:
            name: nacos-sync-config
            items:
              - key: application.properties
                path: application.properties
            defaultMode: 420
      containers:
        - name: nacos-sync
          image: 'tanqidi/nacos-sync:0.5.0'
          ports:
            - name: http-8080
              containerPort: 8080
              protocol: TCP
          resources: {}
          volumeMounts:
            - name: config-volume
              readOnly: true
              mountPath: /app/nacos-sync/conf/application.properties
              subPath: application.properties
          terminationMessagePath: /dev/termination-log
          terminationMessagePolicy: File
          imagePullPolicy: Always
      restartPolicy: Always
      terminationGracePeriodSeconds: 30
      dnsPolicy: ClusterFirst
      securityContext: {}
      schedulerName: default-scheduler
  strategy:
    type: RollingUpdate
    rollingUpdate:
      maxUnavailable: 25%
      maxSurge: 25%
  revisionHistoryLimit: 10
  progressDeadlineSeconds: 600
3. 镜像成品
我已使用 Docker Buildx 构建了同时支持 amd64 与 arm64 架构的镜像,便于在不同平台运行,可按需优化或扩展。
tanqidi/nacos-sync:0.5.0
4. 代码变更
https://github.com/nacos-group/nacos-sync/tree/0.5.0
代码其实还是有点复杂的,需要在 nacossync-worker 模块的 pom.xml 中引入 spring-boot-starter-security 依赖,重新打包生成 JAR 即可启用登录认证功能。
具体代码中我还对其进行了自定义扩展,实现了 Nacos 使用通配符 * 可全量同步到 Eureka,以及 Eureka 使用通配符 * 可全量同步到 Nacos 的能力。
5. 使用方式
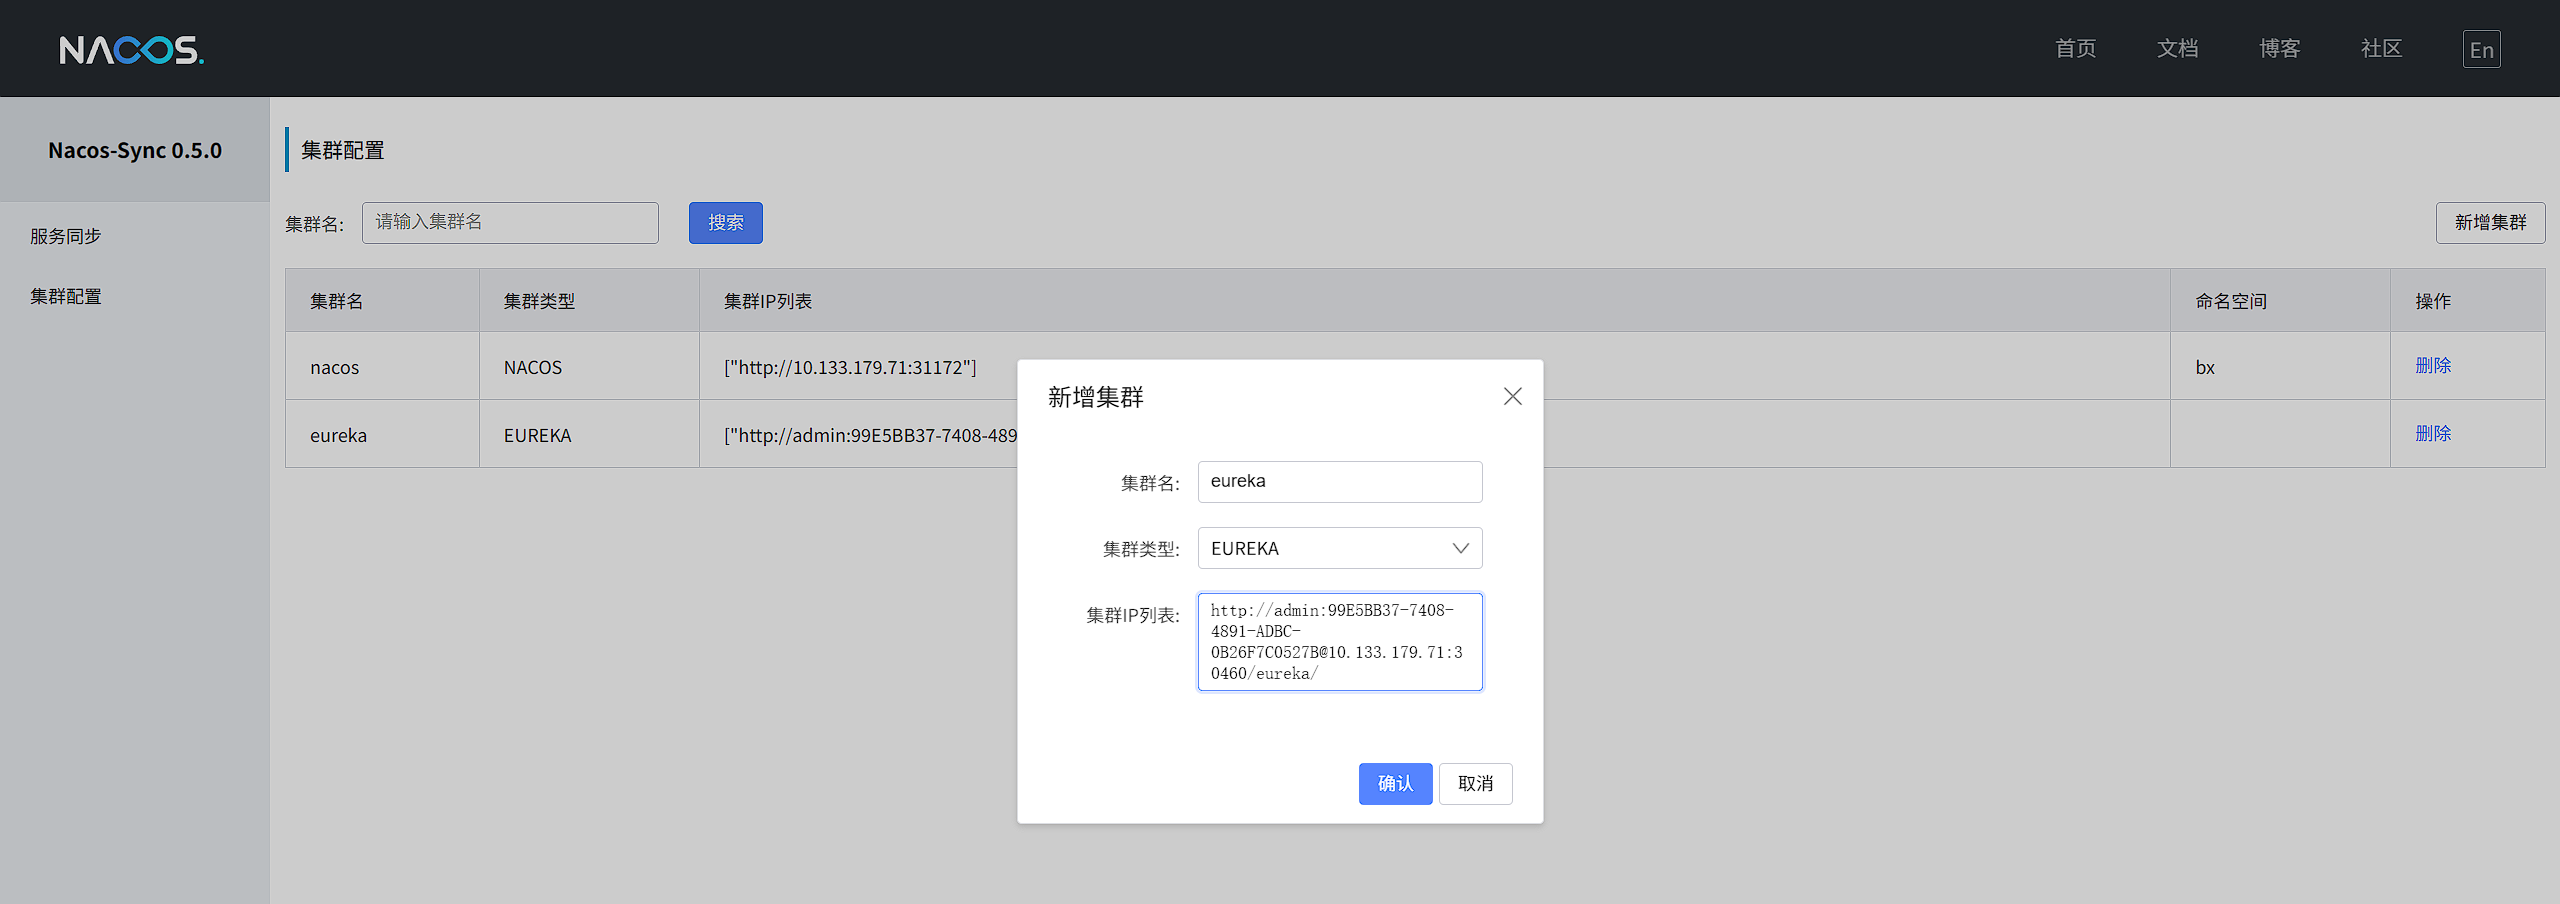
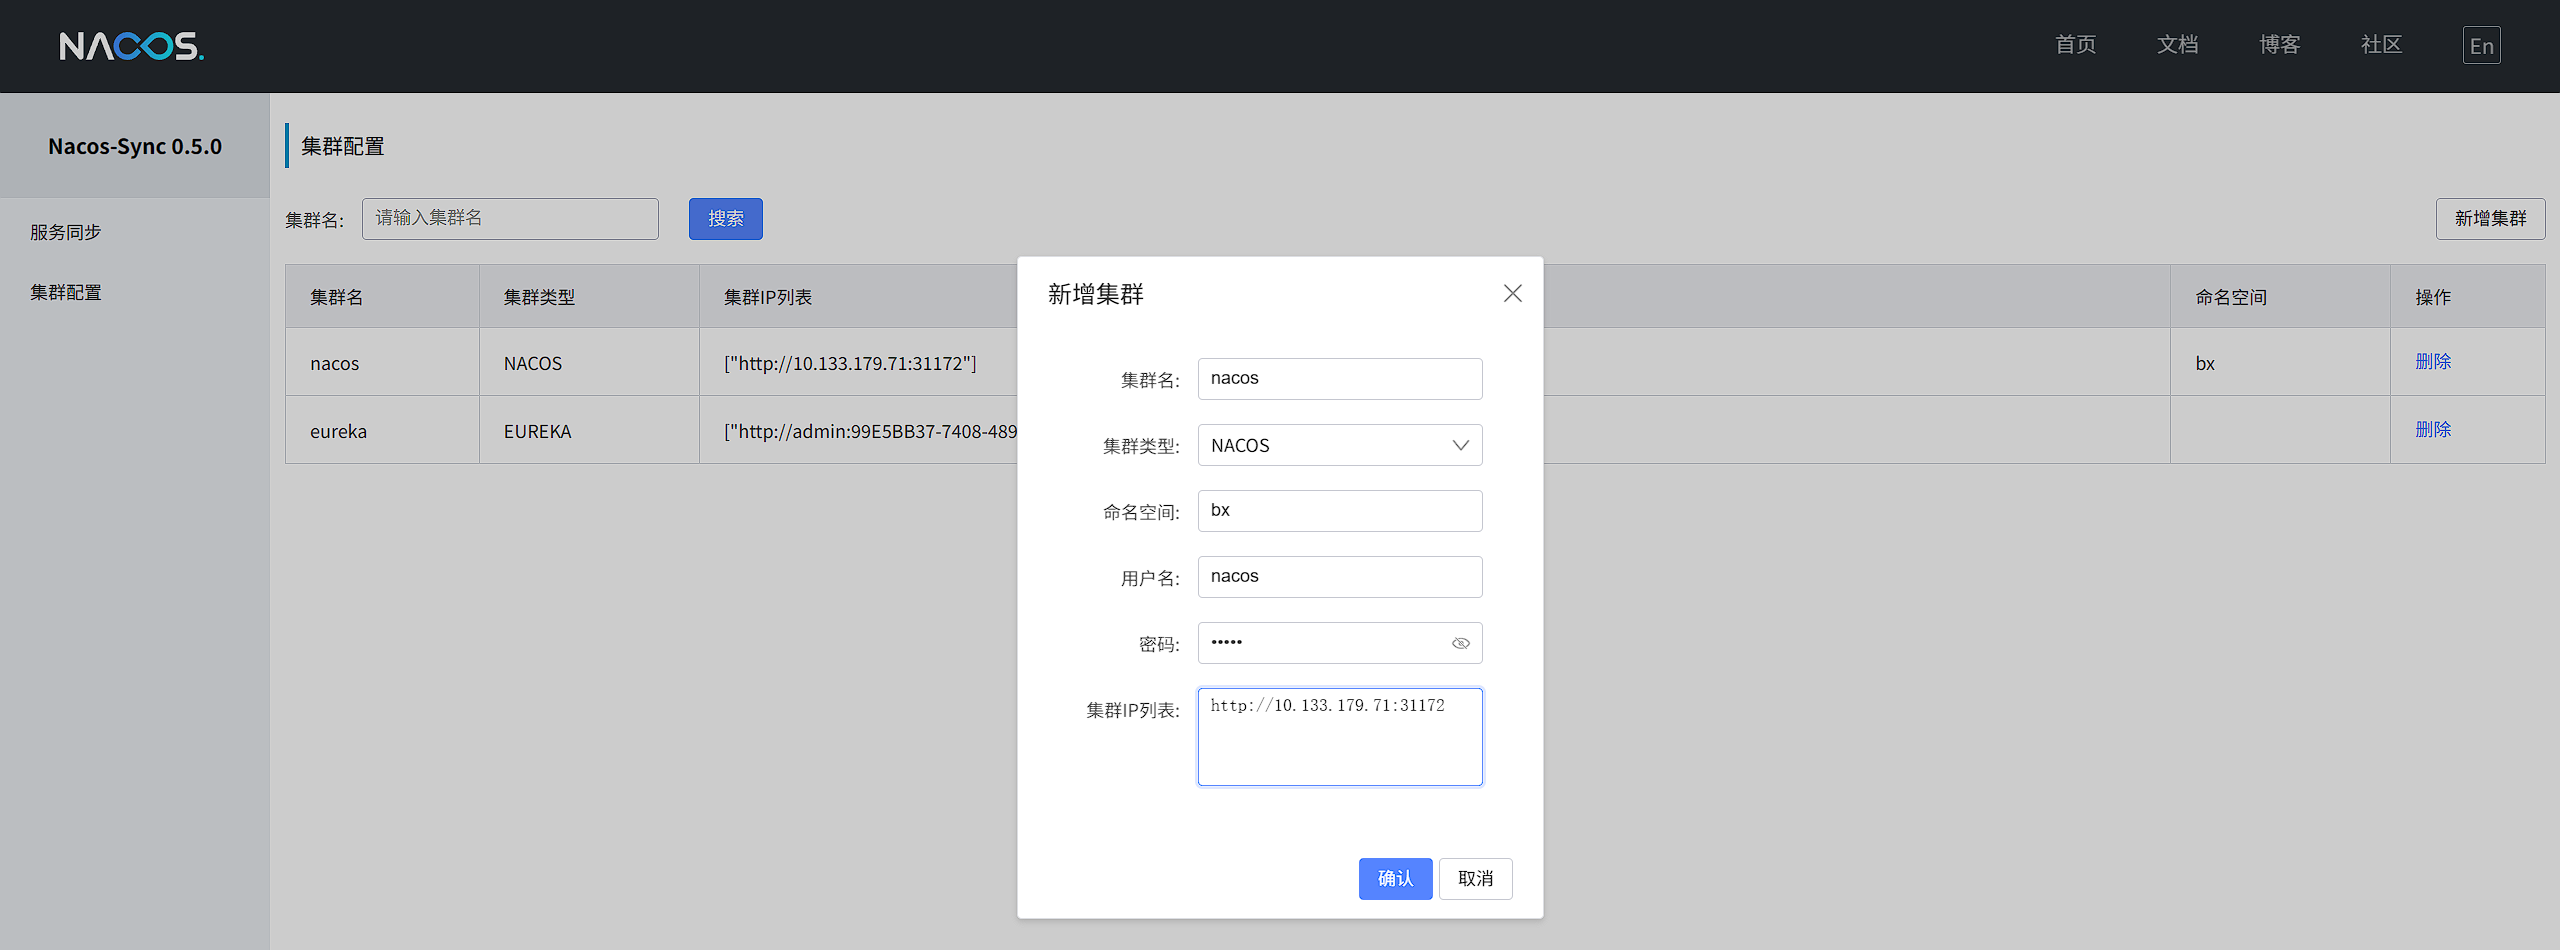
5.1 集群配置
在配置 Eureka 时,集群名称设为 eureka,集群类型选择 eureka。集群 IP 列表直接填写在 Kubernetes 中部署的 Eureka 集群的 VIP 地址即可。由于我这里使用的是 NodePort 方式,便于在 Windows 环境下调试。需要注意的是,之前我们已经启用了 账号密码认证模式,因此在连接地址 http:// 中必须携带账号和密码信息。
在接入 Nacos 时,集群名可以自定义,集群类型选择 nacos 即可。Nacos 本身支持账号密码认证,直接填写你的 Nacos 用户名和密码即可。如果对 namespace 有同步需求,可以填写需要同步的 namespace;否则保持默认即可。至于集群地址,只需要配置 Kubernetes 集群内的 VIP:8848 即可。为了方便在 Windows 环境下调试,我这里使用的是 NodePort,实际生产环境推荐使用 VIP。
5.2 服务同步
在服务同步配置中,如果服务名填写 *,则表示会同步所有服务;分组填写的是前面配置的注册中心 namespace;源集群选择 Nacos,目标集群选择 Eureka,即可实现将该 namespace 下的所有服务从 Nacos 同步到 Eureka。


6. 拓展知识
在 Eureka 体系中,服务注册中心本身只负责维护服务实例的上下线信息,并不会直接参与请求的负载均衡与重试。
当某个服务(如 aaa-service)有多个实例运行时,调用方(如 bbb-service)会从 Eureka 拿到服务实例列表,并在本地缓存。即便某些实例已经下线,Eureka 的控制台上仍可能短时间显示它们,这是由于 心跳超时与剔除周期的延迟机制。在这一时间窗口内,请求仍有可能被分配到下线实例,从而导致调用失败或超时。
不过,真正的 负载均衡与失败重试能力 来自客户端侧的组件:
早期使用 Ribbon(RestTemplate、Feign 默认依赖 Ribbon);
新版 Spring Cloud 使用 Spring Cloud LoadBalancer;
Feign 调用底层也依赖上述负载均衡器。
当请求落到不可用实例时,这些组件会尝试自动切换到存活的实例,保障调用的可用性。
因此,Eureka 管“谁在线”,负载均衡组件管“怎么调度”,两者配合才能实现服务发现与高可用调用。
写在最后
这部分代码相对复杂,我采用 Cursor 编码的方式进行调整,实现了 Nacos 和 Eureka 双向通配符 * 全量同步 的功能。虽然能够正常运行,但逻辑比较粗糙:每隔 30 秒强制更新一次所有实例,因此无法做到实时同步,会有十几到二十秒的延迟。
为了进一步保证稳定性,我还利用 Kubernetes 定时任务,每隔 5 分钟重启一次对应的 Deployment,以防出现意料之外的问题,使服务始终保持在“新建”的状态。
哈哈目前该组件运行良好,已达到预期效果,稳定在运行。
使用 K8S 或 Docker 快速部署 nacos-sync 认证模式
https://tanqidi.com/archives/18da8fed-bacd-44ee-91df-68014573c28b-2c2f15b8
评论